
Knowing how to create an Azure account is the first step to using Microsoft’s cloud for websites, apps, databases, and storage. The sign-up takes about 10 to 15 minutes, but a few details, like card and phone verification, trip up many first-time users.
This guide walks you through every step, explains what happens after sign-up, and shows how to fix the most common problems.
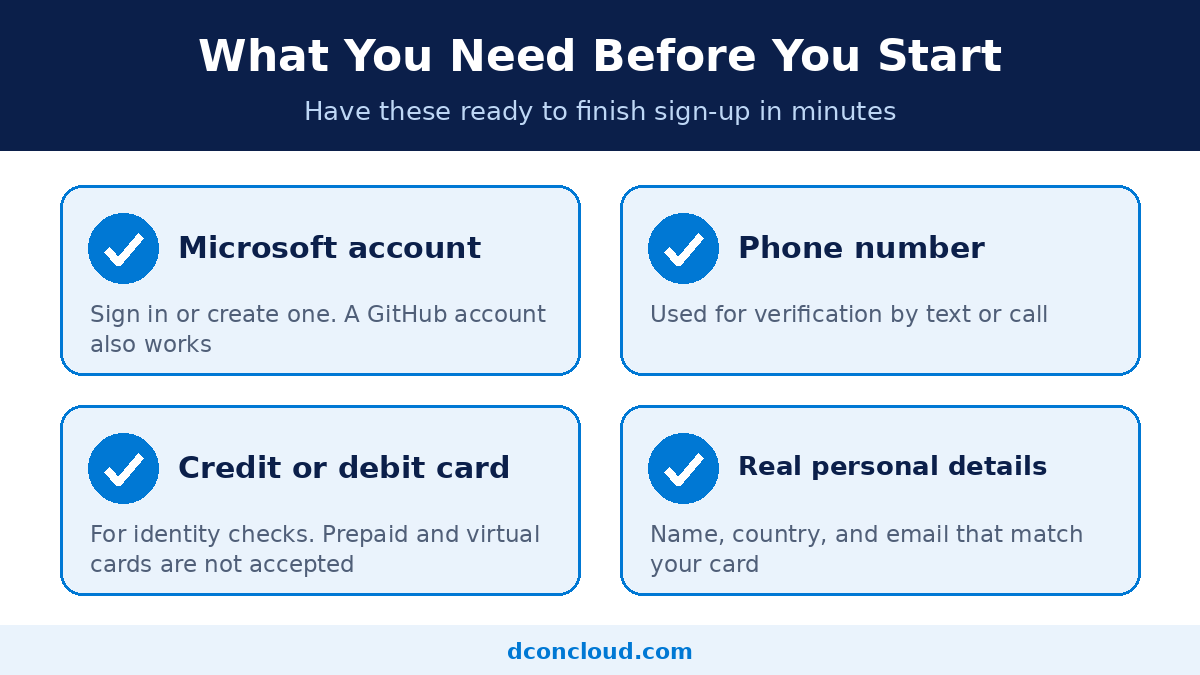
Have these ready so you can finish in one sitting:
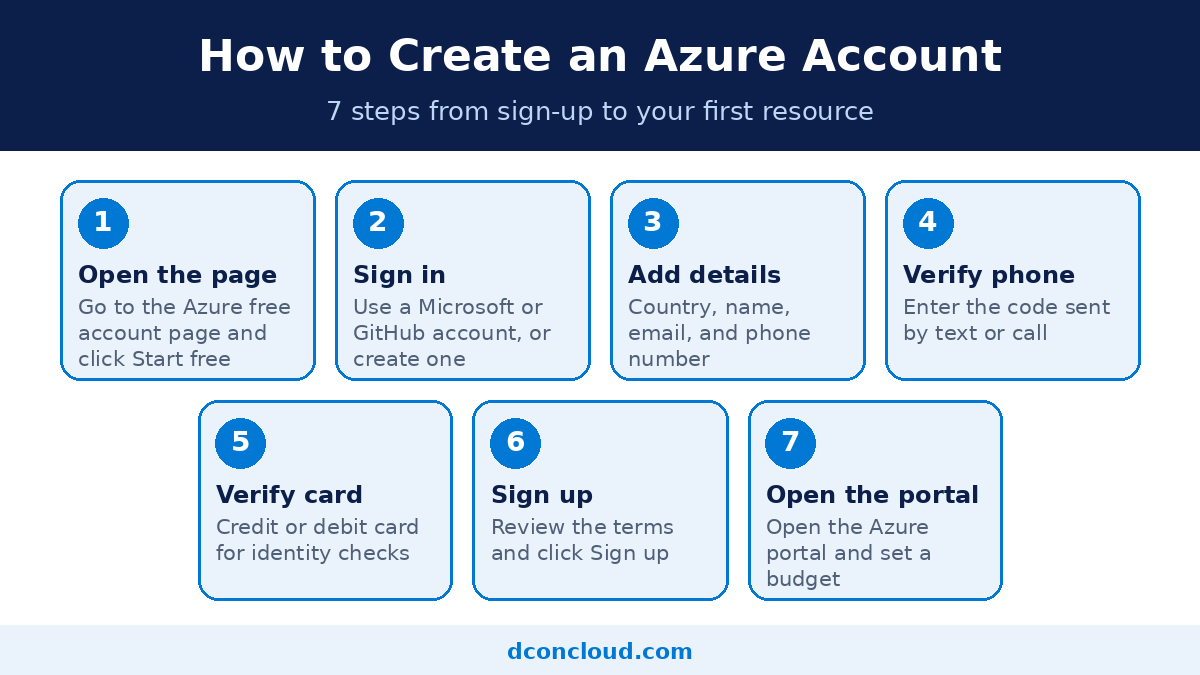
Go to the Azure free account page and click Start free (the button may say Try Azure for free).
Sign in with your existing Microsoft or GitHub account. If you do not have one, choose Create one and follow the prompts to set an email address and password.
Fill in your country or region, name, email, and phone number. Use real information, since it has to match your payment details and cannot be changed freely later.
Choose to receive a text message or a call, then enter the code you get. Double-check the number first, because a wrong digit is the most common reason codes never arrive.
Enter a valid credit or debit card in your own name. You are not charged for the free account, and the card is used to confirm your identity. If you are asked to approve a small hold, it is temporary.
Read the customer agreement, tick the box, and click Sign up. Do not skip the terms, since they explain what happens when the free credit ends.
When sign-up finishes, go to the Azure portal. This is the dashboard where you create and manage virtual machines, web apps, databases, and storage. Set a budget alert before you deploy anything.
A new Azure free account includes a $200 credit to use on Azure services within 30 days, plus selected free services. When the 30 days end, or when the credit is used up, you need to move to pay-as-you-go to keep services running. Moving early does not forfeit your remaining credit.
Not sure which option fits? Read our comparison of the Azure free account vs pay-as-you-go to decide before the 30 days are up. You can also confirm the latest terms on Microsoft’s free account FAQ.
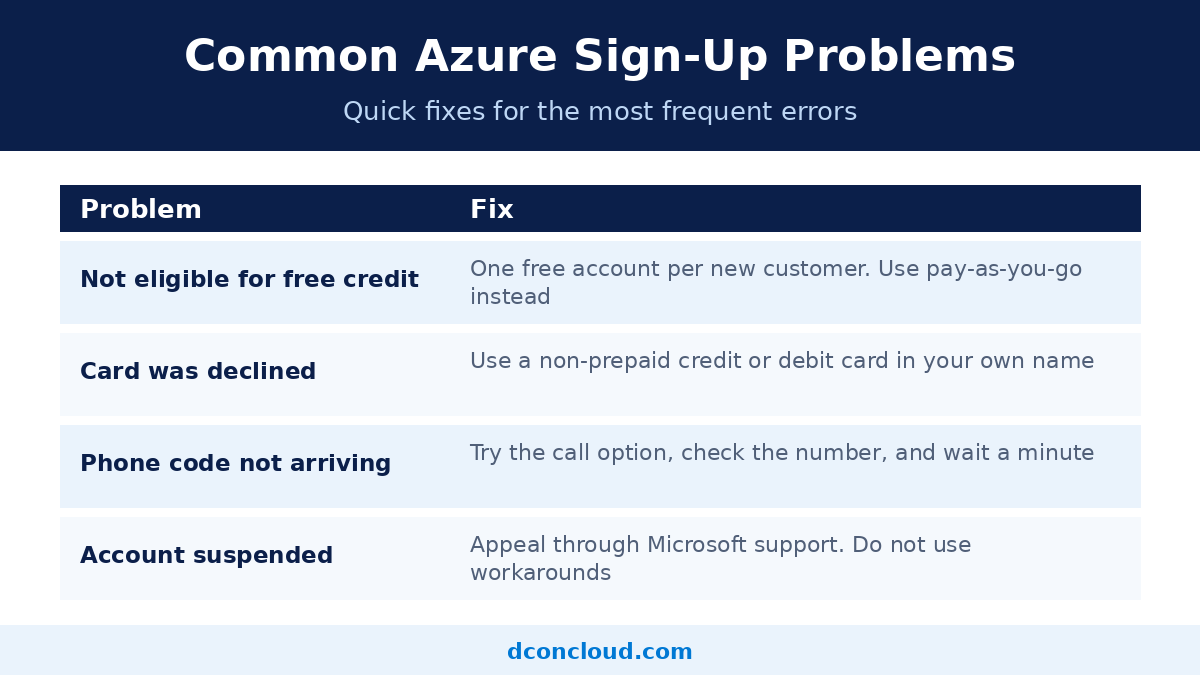
| Problem | What to do |
| Not eligible for the free credit | Microsoft allows one free account with the credit per new customer. If you are not eligible, sign up with pay-as-you-go instead. |
| Card was declined | Use a regular credit or debit card in your own name. Prepaid and virtual cards are generally not accepted. Check that the billing address matches your bank records. |
| Phone verification code not arriving | Check the number and country code, try the call option instead of text, and wait a few minutes before requesting a new code. |
| Account suspended or restricted | Contact Microsoft support and follow the appeal process. Do not try workarounds. |
A warning about shortcuts. Some sellers advertise ready-made Azure accounts. These are usually created with someone else’s details or trial credit, which breaks Microsoft’s terms, and they can be shut down at any time, taking your data and workloads with them. The safe route is a subscription created under your own verified organization.
Direct sign-up works well for learning and small tests. A reseller makes sense when you want invoice-based billing, guided setup, cost reviews, or one team for support, with the subscription still owned by you.
DconCloud helps customers buy an Azure subscription through an authorized partner with onboarding and ongoing cost optimization. If you work on other platforms, see our Google Cloud reseller services and DigitalOcean setup services, or visit our cloud services homepage.
Is it free to create an Azure account?
Creating an Azure free account costs nothing, and you are not charged unless you choose to move to pay-as-you-go. You get a $200 credit to use within 30 days.
Do I need a credit card to create an Azure account?
Yes. Azure asks for a credit or debit card for identity verification. Prepaid and virtual cards are generally not accepted.
Can I create more than one Azure free account?
No. Microsoft limits the free account and $200 credit to one per new customer. If you are not eligible, you can sign up for pay-as-you-go instead.
How long does it take to create an Azure account?
Most people finish in about 10 to 15 minutes if they have a phone and a valid card ready.
Creating an Azure account is simple when you have your Microsoft account, phone, and a non-prepaid card ready. Follow the seven steps, set a budget right away, and decide on pay-as-you-go before your 30 days end so nothing stops unexpectedly.
Want expert help with setup, billing, or cost control? Request a free Azure quote and our team will guide you.